Your doctor has ordered a sleep study, and now the questions are piling up. Will you actually be able to sleep with wires attached to your head? Is someone really going to watch you all night? What if you need the bathroom? What if you get no sleep at all, does the test still work?
The anticipation is often the hardest part. Once people understand exactly what happens, from the moment they walk in to the moment they get results, most of the anxiety evaporates. This guide walks through the entire process step by step, for both the in-lab study and the at-home version, so you know precisely what you're walking into.
Before You Book: In-Lab or At-Home?
There are two main types of sleep studies, and your doctor will typically decide which one fits your situation. If you haven't already, it's worth understanding the difference: our guide on home sleep tests vs. in-lab studies breaks down when each is used. This article focuses mainly on the in-lab experience, since that's the one that generates the most questions and anxiety, but includes the at-home process as well.
Step 1: The Days Before Your Study
You'll get instructions from the clinic, usually a few days in advance, covering:
- What to bring
- What to avoid (caffeine after noon, alcohol the day of, and sometimes naps)
- Whether to continue or pause any medications
- What time to arrive
Follow medication instructions carefully. Some medications (certain antidepressants, sedatives, or stimulants) can affect sleep architecture and need to be paused before testing, particularly if narcolepsy is being investigated with a same-day Multiple Sleep Latency Test. Never stop a medication without your doctor's explicit guidance, some can't be safely discontinued abruptly.
What to pack for an in-lab study:
- Comfortable, loose-fitting pajamas (two-piece, since electrodes are placed on your chest and legs)
- Your regular toiletries and any nighttime routine items
- A pillow or item from home if it helps you feel comfortable (optional; most labs provide bedding)
- A book, tablet, or something to help you wind down before the sensors go on
- Any medications you take in the evening or morning
- Your insurance card and ID
Skip the following on the day of your study:
- Caffeine, ideally from early afternoon onward
- Alcohol
- Naps (unless specifically instructed otherwise)
- Hair products like gel, oil, or heavy conditioner (they interfere with scalp electrode adhesion)
Step 2: Arrival and Check-In
You'll typically arrive at the sleep center in the early evening, often between 7 and 9 PM. This isn't a hospital ward. Most sleep labs are designed to look and feel like a hotel room or bedroom, private, comfortable, with a real bed, its own bathroom, and dim lighting.
At check-in, you'll complete paperwork (if not already done in advance), confirm your medical history, and a sleep technologist will explain the process and answer your questions. This is the moment to ask anything on your mind, technologists do this every night and are used to first-time nerves.
You'll usually have time to change into your pajamas and go through part of your normal bedtime routine before the sensor setup begins.
Step 3: Sensor Placement (The Part Everyone Worries About)
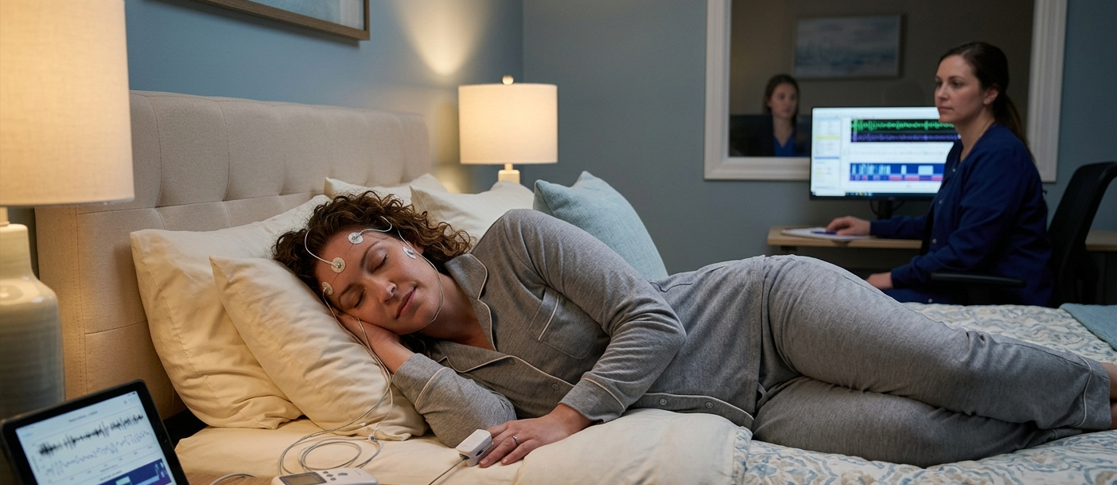
This is the step that generates the most anxiety beforehand and turns out to be the most anticlimactic in practice. A sleep technologist attaches a series of small sensors to your body, a process that takes 45 minutes to an hour.
What gets attached, and where:
- Scalp electrodes (EEG): Small metal discs attached with a mild adhesive paste to measure brain wave activity and determine your sleep stages. Usually 6 to 8 electrodes across the scalp.
- Eye sensors (EOG): Placed near the outer corners of your eyes to track eye movements, which help identify REM sleep.
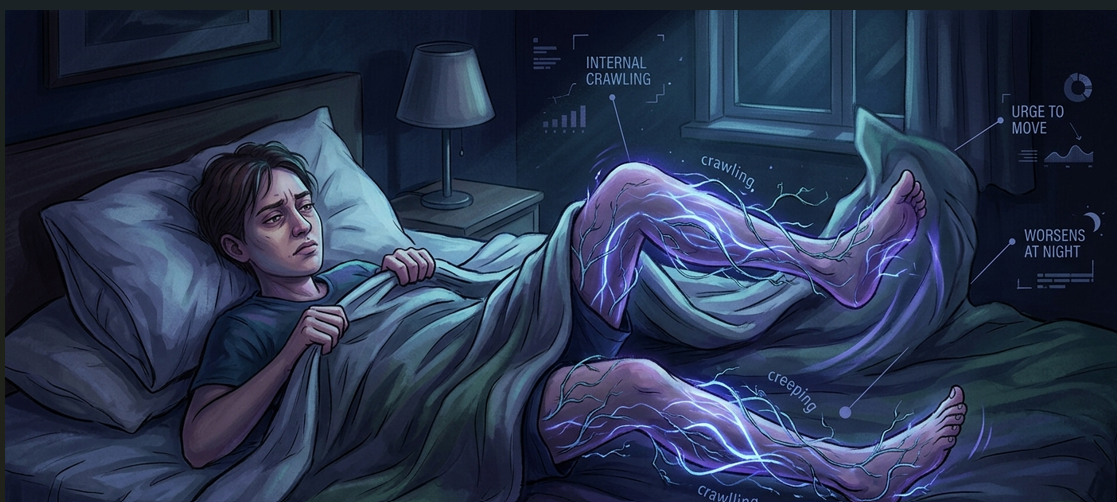
- Chin and leg sensors (EMG): Track muscle activity in your chin (relevant to sleep stage scoring) and shins (to detect leg movements associated with restless legs syndrome or periodic limb movement disorder).
- Chest belts: Two elastic bands around your chest and abdomen measure breathing effort.
- Nasal cannula: A soft tube resting just under your nostrils measures airflow.
- Finger clip (pulse oximeter): Measures your blood oxygen levels and heart rate throughout the night.
- EKG leads: A few sensors on your chest track your heart rhythm.
- A small microphone, often near your throat, records snoring.
All of these wires feed into a small junction box, which connects to the monitoring equipment. Importantly, the wires are bundled and given enough slack that you can turn over, change position, and get out of bed without disconnecting anything.
Does it hurt? No. The adhesives are mild and designed for skin contact. Some people find the scalp paste slightly odd in texture, but it's not painful, and it washes out easily with regular shampoo. The most common complaint is that it looks strange and feels unfamiliar, not that it's uncomfortable.
Step 4: A Calibration Check
Before lights out, the technologist runs a brief calibration, asking you to do simple things like blink, look left and right, clench your jaw, breathe in and out, and pretend to snore. This confirms every sensor is working properly before the real recording begins, and it takes only a couple of minutes.
Step 5: Lights Out
Once calibration is complete, the technologist leaves the room, dims the lights, and lets you settle in to sleep at your normal bedtime, or as close to it as your appointment time allows. The technologist monitors your signals remotely from another room, watching the data feed in real time and observing you through infrared video (audio and video are part of a standard sleep study; you'll be informed of this and it's necessary for full interpretation, including catching things like sleepwalking or unusual behavior).
If you need the bathroom during the night, this is completely normal and accounted for. There's an intercom or call system to alert the technologist, who will come in, help you manage the leads, and reconnect everything afterward. It happens routinely and is not an interruption anyone will be bothered by.
If a sensor comes loose, the technologist can see this on their monitoring screen and will come in briefly to reattach it, usually without fully waking you.
Step 6: "I'll Never Fall Asleep Like This"
This is, by far, the most common worry, and it's worth addressing directly: you do not need a perfect night's sleep for a valid study. Sleep labs and interpreting physicians are well aware that a first night in an unfamiliar bed, wired to sensors, produces some degree of what's called the "first night effect", lighter, more fragmented sleep than usual.
Modern scoring accounts for this. Studies generally need a minimum of a few hours of recorded sleep to be interpretable, and most people, despite being convinced beforehand that they won't sleep a wink, do fall asleep, often faster than they expect once the lights are off and the initial novelty wears off. If your sleep truly doesn't reach a usable amount, your doctor may recommend a repeat study, but this is uncommon.
You don't need to try to force sleep or feel pressured. Read, relax, do what you'd normally do to wind down, minus the phone scrolling, since screens right before a monitored study aren't typically encouraged.
Step 7: Morning and Wake-Up
You'll be woken at a set time, usually between 5:30 and 7 AM, depending on the lab's schedule. The technologist comes in, removes all the sensors (this takes just a few minutes and is not uncomfortable), and gives you time to wash up. Most labs have a private bathroom with a shower so you can rinse off the electrode paste before heading to work or home.
You'll typically fill out a brief questionnaire about how you slept compared to your usual night, which helps the interpreting physician contextualize the data.
And that's it. You're free to go.
What Happens with an At-Home Sleep Test Instead
If your doctor has ordered a home sleep apnea test rather than an in-lab study, the process looks different:
- Pickup or delivery: You collect a small portable device from the clinic, or it's mailed to you, along with instructions or a brief video tutorial.
- Self-application: At home, on the designated night, you attach the sensors yourself: typically a nasal cannula, a chest or finger effort belt, and a fingertip oxygen sensor. Technologists are usually available by phone if you have trouble.
- A normal night in your own bed: You sleep as you normally would, with the device recording airflow, breathing effort, oxygen levels, and heart rate.
- Return the device, either by drop-off or prepaid mail, and a sleep physician interprets the results, typically within a few days to two weeks.
It's simpler and less clinical, but keep in mind it measures fewer signals and can't detect brain activity, meaning it's built specifically to evaluate for obstructive sleep apnea, not the broader range of sleep disorders an in-lab study can catch.
Getting Your Results
Timeline: Most sleep studies are interpreted by a board-certified sleep physician within a few days to two weeks, though it varies by clinic. Ask at your appointment what to expect and how you'll be notified, phone call, patient portal, or a follow-up visit.
What the report includes: Your AHI (apnea-hypopnea index, the count of breathing disruptions per hour), oxygen levels throughout the night, sleep stage breakdown, any leg movements recorded, and a diagnostic impression.
Next steps: If your study confirms a diagnosis, such as obstructive sleep apnea, you'll typically have a follow-up appointment to discuss treatment options. In some cases, if in-lab testing showed significant apnea, part of the same night may have been used for a "split-night" study, where CPAP therapy is introduced and titrated once the diagnosis is confirmed, so you may leave already knowing your treatment pressure settings.
Common Questions
Can I bring a phone or tablet? Yes, for winding down before lights out. Most labs ask that you put screens away once monitoring begins, similar to standard sleep hygiene practice.
What if I usually sleep with a partner? Most in-lab studies are done solo, since only one bed and monitoring setup is typically in the room. If sharing arrangements are a concern (for example, a parent needing to stay with a child undergoing a pediatric sleep study), ask the clinic in advance, many pediatric sleep labs have setups specifically for this.
Will I be recorded on video? Yes. Video and audio recording is a standard part of polysomnography, used to help interpret unusual movements, behaviors, or sounds alongside the physiological data. Recordings are handled as protected health information, the same as any other part of your medical record.
What if I have claustrophobia or anxiety about the setup? Tell the clinic when you schedule. Many technologists can adjust their approach, explain each step as they go, and give you more control over the pace of the setup. Some patients find it helpful to visit the lab in advance or ask for a photo of a typical setup beforehand.
Can I take my usual sleep medication? Only if your doctor has approved it. Some medications alter sleep architecture in ways that interfere with accurate results, particularly for narcolepsy testing, so always confirm rather than assume.
What if I don't sleep at all? As covered above, this is rare in practice, and the lab accounts for reduced sleep to some degree. If it becomes a real issue, your physician will discuss whether a repeat study is warranted.
The Bottom Line
A sleep study looks intimidating from the outside: wires, cameras, a stranger monitoring you, an unfamiliar bed. In practice, it's a well-established, painless process that thousands of people go through every night in accredited labs. The setup is quick, the sensors don't hurt, bathroom breaks are handled routinely, and most people sleep enough for a valid result even in an unfamiliar setting.
Understanding each step in advance, and knowing that the concerns you're anticipating are the same ones nearly every patient has, tends to be the best antidote to the anxiety. The study itself is just one night. What comes after, an actual diagnosis and a path to better sleep, is the part that matters.
Ready to schedule your study? Use our sleep clinic directory to find an AASM-accredited sleep center near you and get your questions answered before you book.
Written by
Daniel Marin
Sharing insights on sleep health and wellness to help you achieve better rest and improved quality of life.